


Before Removing Fixing Unit: Detach the rear right cover of the printer using the steps outlined below.
- Open the cassette lower right cover [2].
- Open the cassette upper right cover [1].
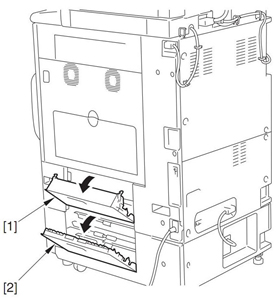
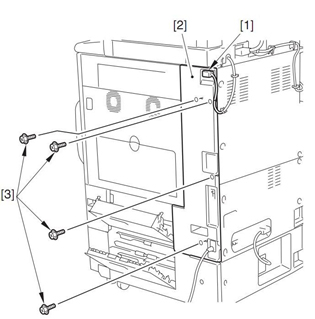
Detach the rear right cover [2]. Note: The rear right cover is attached using 4 screws [3].
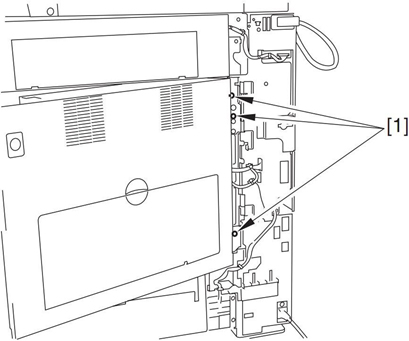
- Remove three screws [1] and open the double hinge of the right cover.
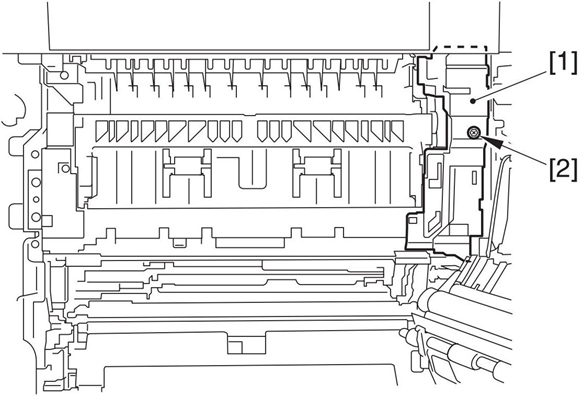
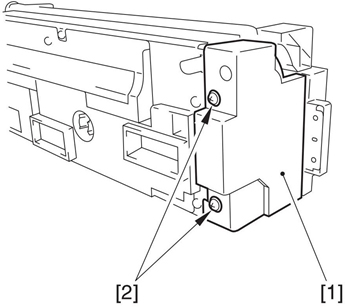
- Detach the connector cover [1]. Note:The connector cover is held in place by one screw [2].
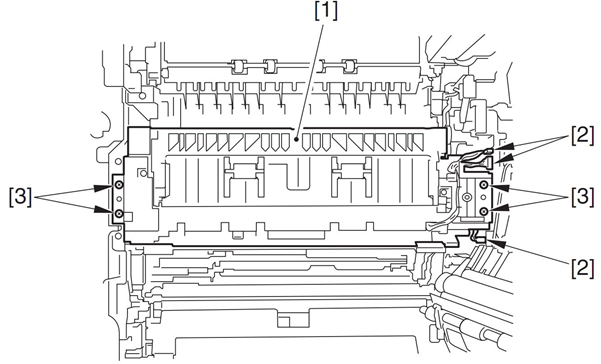
- Remove the fixing unit [1]. Note: The fixing unit is held in place by three connectors [2] and four screws [3].
- Detach the fixing front cover [1]. Note: The fixing front cover is held by two screws [2].
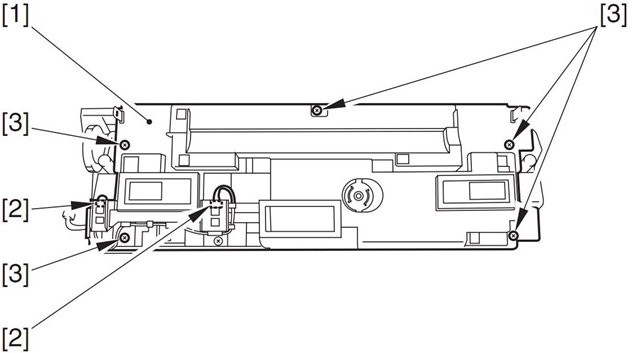
- Remove the shutter unit [1]. Note: The shutter unit is held in place by two connectors [2] and five screws [3].
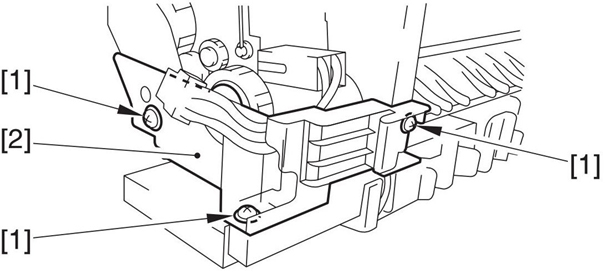
- Remove three screws [1], and detach the cable cover [2].
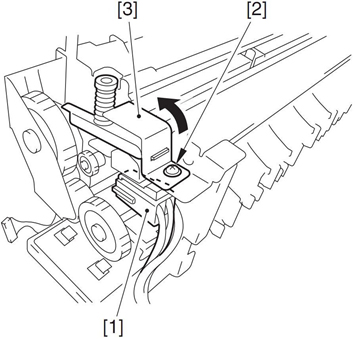
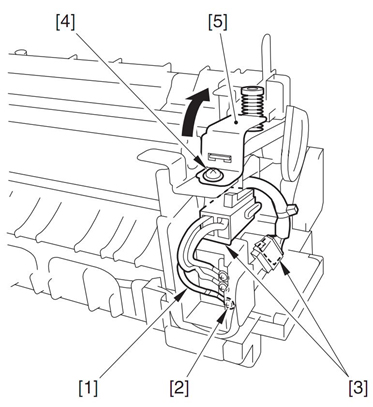
- Disconnect the connector [1].
- Remove the screw [2], and open the retainer arm [3].
- Remove the screw [2] that attaches the grounding wire [1].
- Disconnect 2 connectors [3].
- Remove the screw [4], and open the retainer arm [5].
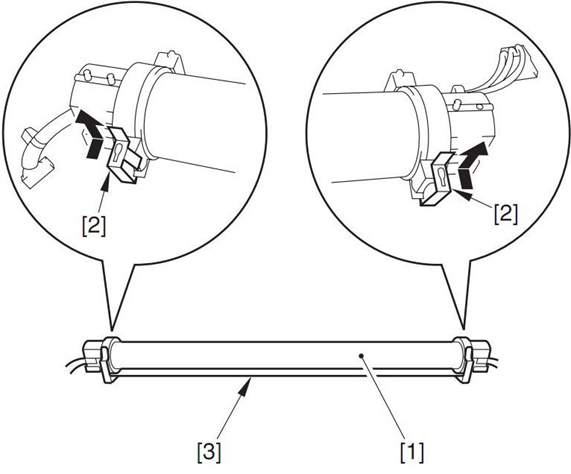
- From
the Fixing Film Unit [1], slide the 2 leaf springs [2] in the direction
of the arrow and remove them. Next, remove the separation guide [3].
Removing Fixing Film Unit:
- Install the screw [5], and open the retainer arm [4].
- Connect 2 connectors [3].
- Install the screw [1] that attaches the grounding wire [2].
- Install the screw [3], and open the retainer arm [2].
- Connect the connector [1].
- Install three screws [1], and detach the cable cover [2].
- Install the shutter unit [1]. Note: The shutter unit is held in place by two connectors [2] and five screws [3] install all the screws and the two connectors.
- Install the fixing front cover [1]. Install the two screws [2].
Install the fixing unit [1]. Connect the three connectors [2] and intall the four screws [3].
Install the connector cover [1].Install the one screw [2].
Install the three screws [1] and close the double hinge of the right cover.
Attach the rear right cover [2]. Install the 4 screws [3].
Close the cassette upper right cover [1].
Close the cassette lower right cover [2].


